| Home |
| Daf history |
| Our Daf project |
| Daf Literature |
| Daf technical info |
| FAQs |
| Daf links |
As we started using Betty more regularly, it became apparent that the battery charging ("ignition") light was glowing slightly most of the time. You couldn't really see it in daylight but, at night, there was a slight glow. As winter has arrived, and the battery is going to be under a lot more stress for the next few months, it was time to do a quick service of the dynamo. Despite their reputation for unreliability, there's no real reason why a well set-up dynamo shouldn't cope with the demands of day-to-day use.
Assuming no major faults (which will generally lead to total charging failure), about the only thing that can reduce a dynamo's output are problems with the brushes and commutator. Apart from a general check of bearings and wiring for condition, it's the brush area that needs most attention. So, let's get started.
On these Bosch units, the brushes can be accessed by removing a metal ring near the back. This is enough for inspection, and for replacing the brushes, but doesn't really give enough access for inspecting or cleaning the commutator, or for visually checking other parts:
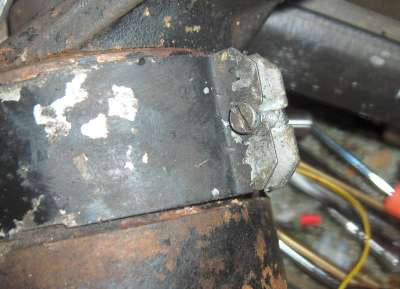

The dynamo is held together by two long screws that run from the back plate to the front. There is also an internal screw, visible through a cut-out in the back plate, which has to be undone before the backplate can be lifted away:
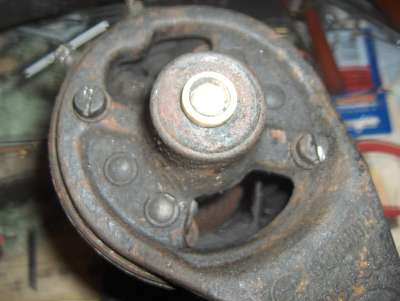
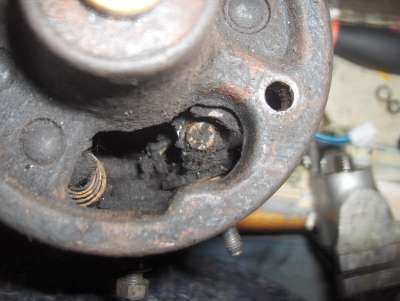
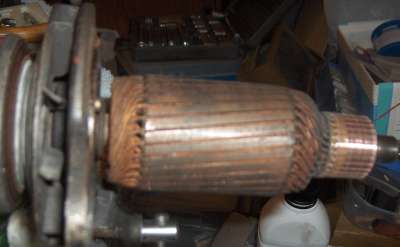
With these undone, the dynamo separates into three parts - the front plate and armature, carrying the pulley; the casing including the field coils; the back-plate and brushes. What we're going to concentrate on is the commutator (on the end of the armature) and the brushes:
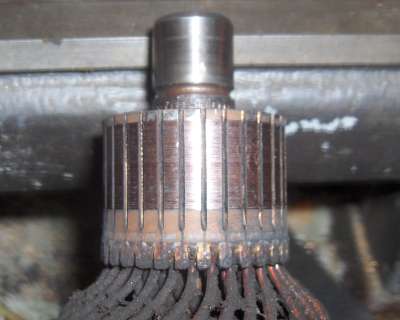
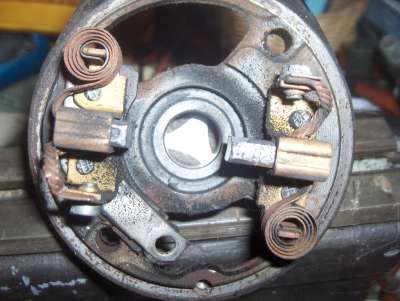
Over time, the copper strips ("segments") that make up the commutator will burn and / or tarnish and this is a common reason for the output reducing - the brushes form a sliding contact on these segments and any tarnish will add resistance, which will reduce the output available. Similarly, the brushes themselves will gradually wear down in use and, if they wear too short, won't press on the commutator hard enough to make a good contact. The result will be increased sparking which, in turn, leads to more brush wear and more commutator burning. Usually, restoring the surface of the commutator and fitting new brushes will bring things back to how they should be.
If the commutator surface is badly worn then it will need to be re-finished in a lathe and the insulation between the segments "undercut" so that the gaps lie below the level of the copper again. In many cases, ours included, all that's needed is to clean the surface of the copper with some fine glass- or wet-and-dry paper. The easiest way to do this is to mount the front plate in a vice and spin the whole armature, while polishing the surface of the commutator with the paper. The brushes are replaced by undoing the screw holding their lead, gently lifting the spring away from them, and pulling them out of their holders. Although there are minimum lengths quoted (about 0.6 inches for this dynamo), if you've got this far you may as well replace them if spares are available. Make sure that they are completely free to slide in their holders - if needed, they can be filed down slightly using a fine file. In fact, for this job, a set of very oversized were cut and filed to fit:
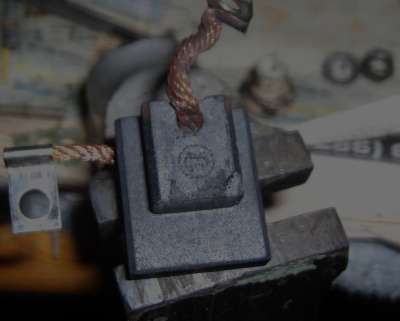
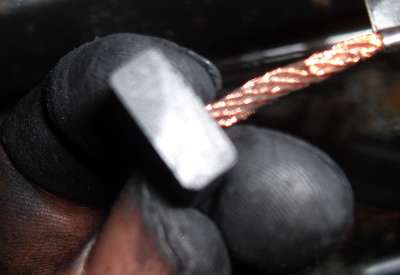
Note that filing brushes is a messy job! Also, if you file to fit, make sure that you chamfer the four long edges slightly - this will help to make sure they don't get stuck in their holders as dust builds up in use.
Reassembly, as they say, is a reversal of the above. Before starting, clean all parts to whatever standard you want - obviously, you should remove all dust etc from inside and you may also wish to degrease the outside. In this case I didn't worry about cosmetic cleaning because Betty will be getting her entire engine bay cleaned when the spring comes!
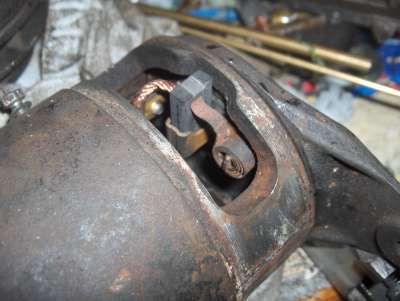
Pour a little oil into the plain bush bearing at the back end before you start. One point to watch is that you don't catch the commutator on the brushes as you put it together. The easiest way to ensure this is to reassemble the back plate to the casing (and refit the internal contact screw) first. Then, using the side slots, carefully pull the brushes out far enough that the springs slip off the ends of them. The springs will now push on the side of the bushes and hold them far enough out to give clearance for the commutator:
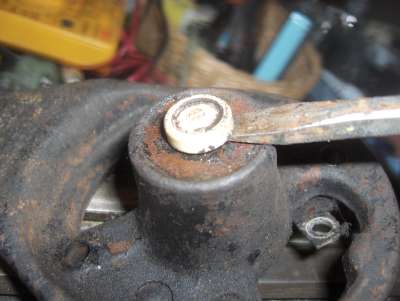
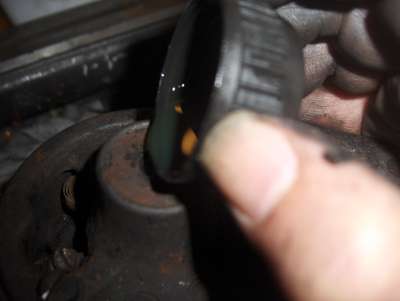
Finally, once the unit is assembled, prize out the plastic cap from the back and pour in a little more oil for that bush - there's a felt pad in there that will absorb it and let it onto the bush over time. Pop the cap back in and refit to the car.
Once refitted, check that the charging light goes out as soon as the car starts. If it doesn't, stop the engine immediately and check that you've re-connected it correctly. If all the connections are right then remove the wire from the "D+" terminal (the heavier of the two wires) and connect a voltmeter between the terminal and the car's body (earth). Re-start and see what voltage is being produced - it should be around 6 volts or 12 volts depending on the car's voltage. If, as happened with this one, you read a negative voltage (that is, the output from the dynamo is more negative than the car's body) then the dynamo needs "re-polarising". The usual way to do this is by disconnecting both wires from the dynamo and using a length of wire to "flash" between the battery live (+ve on a -ve earth system or -ve on a +ve earth) and the field connection - the smaller (connection for the thinner wire)- on the dynamo. This does not work with these units!!! In fact, it makes the problem worse!!! I was unable to find any information on this situation in my old books, or online so had to resort to the wiring diagrams for a solution.
What seems to be the problem is that, whereas most dynamos have a positive feed into the field terminal in use, these ones have the terminal "grounded" by the regulator in use - so the required polarity is actually reversed! There are two ways to get round this. One is to ground the field terminal and then flash from the battery live to the D+ (bigger) terminal on the dynamo, but this means you're also putting current through the armature windings - which will take a LOT of current!.
The alternative is to remove the dynamo again and connect it in reverse across the battery - using jump leads, connect the positive of the battery to the case of the dynamo and the negative of the battery to the field terminal. The dynamo will start to spin like an electric motor. Give it a couple of seconds, then do the same with the D+ terminal - this time it should spin a lot slower, if at all. Finally, refit and try again.
As a final note, Betty is now happy to charge, with the light completely off, even with all available electrics running - wipers, halogenm high-beam lights, and the radio (with its 12v converter). There's still a slight glow under these conditions at idle, but the light goes out and stays out as soon as the revs rise, which is all you want from a dyno system!